- May 7, 2020
- Posted by: Taylor Johnson
- Category: Developer

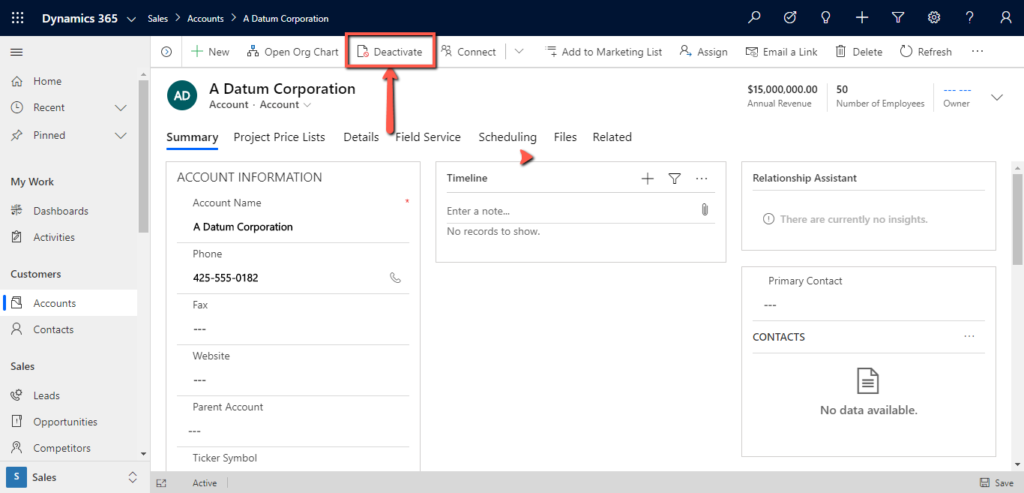
Microsoft Dynamics allows you to change almost everything in it. Straight out of the box, you can customize forms, views, charts, etc… One of the things you may have noticed that isn’t changeable however is the Ribbons on the top of forms and views. You can see an example below.

Ribbons require a custom Solution in order to change them. There is a solution called Ribbon Workbench Editor which is the best solution on the market to perform ribbon customizations. You can download this Solution at this LINK.
Once you have the Ribbon Workbench Editor, go back to Microsoft Dynamics and go to advanced Settings, Solutions. Once there, press the “Import” button as seen in the image below.

This will populate a screen asking for the zip file of the solution that you just downloaded. Press Next once the file is selected.

Press Next.

Press Import in the final screen seen below.

Congratulations, now you should have added a new solution to your tenant! You can see the added option at the top of your screen.
Now that the solution is imported, let’s create a test scenario.
Example: You are the administrator of a company that doesn’t want any user to be able to deactivate an account.
This creates an issue because you can’t make this customization without the Ribbon Workbench Editor. Follow the steps below to complete the task.

Before you click on the Ribbon Workbench button, make a solution and add the account entity to the solution. Then publish your customizations.
Finally, go back to Settings, Solutions, and press the button called “Ribbon Workbench 2016”. This will populate the screen seen in the image below. Select the solution that you just created.

Once you have selected your solution, you will see the main editing screen in Ribbon Workbench.

Here, if you right click on any of the buttons that you do not wish to see, you will see the option to hide them. This is much better than deleting because you can roll back your changes. In the image below, the deactivate button has been hidden on all 3 possible areas that is could be pressed.

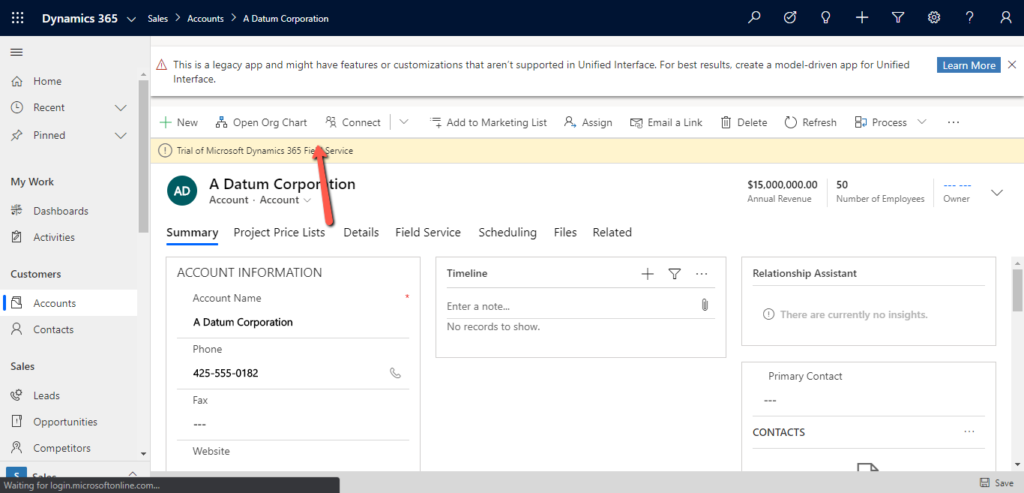
Whenever you are satisfied with the changes, press the publish button at the top of the screen. You can see the before and after in the images below.


The Ribbon Workbench Editor is a very powerful tool that allows you to make changes that before were very code intensive. It is a low code solution that makes our jobs much easier. In future posts, we will go further in depth with creating custom buttons and adding JavaScript to a button.
